Tired of getting out of bed just to change your fan’s speed?
This constant back-and-forth is annoying.
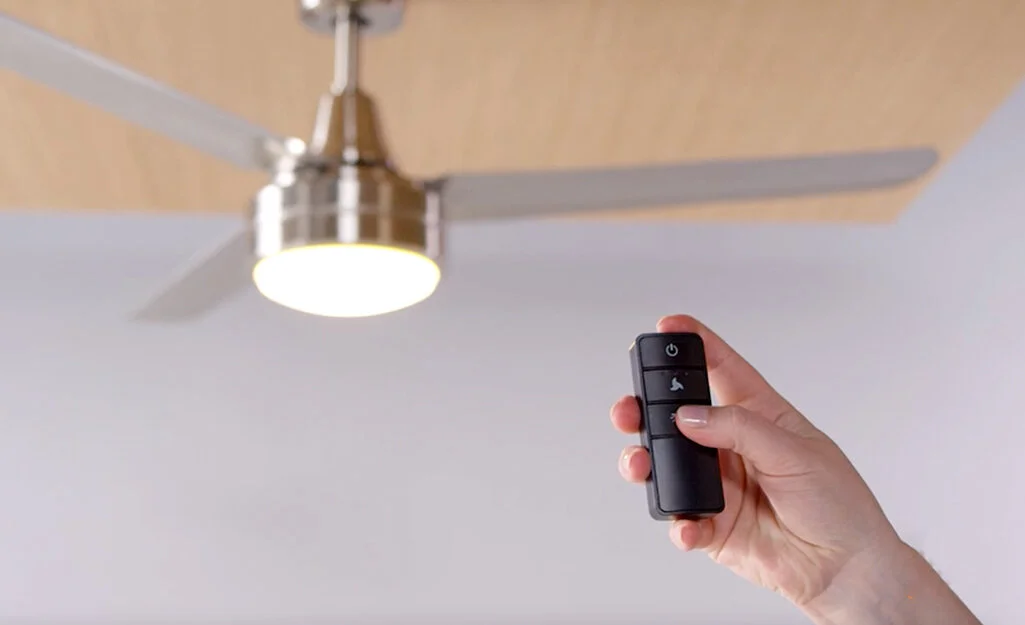
A remote-controlled fan gives you total comfort right from your fingertips.
A remote-controlled fan works using a simple system.
The remote acts as a transmitter, sending a signal to a receiver inside the fan’s housing.
This receiver then tells the fan’s circuitry to change speed or turn on a light.
It’s a clever bit of technology that makes life more convenient.
But what are the key parts that make this possible?
Let’s dive deeper into the components inside your fan, how to troubleshoot them, and even how you can upgrade an older fan.
A Guide to Your Ceiling Fan’s Main Parts
Is your fan acting up but you don’t know why?
It’s frustrating when you can’t identify the problem.
Understanding the main parts helps you figure out what’s wrong.
A remote-controlled fan has several key components working together.
The most important are the receiver box that catches signals, the motor that spins the blades, and the capacitor which helps the motor run properly.
To truly understand your fan, it helps to know what each part does and how it can cause problems.
When you know the role of each component, you can better diagnose an issue, whether it’s a strange noise or a fan that won’t respond.
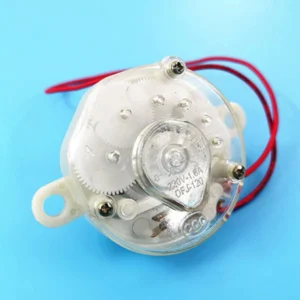
The Receiver Box
Think of the receiver box as the fan’s ear.
It’s the small box, usually located in the fan’s housing near the ceiling, that listens for commands from your remote control.
The remote and the receiver are set to the same frequency so they can communicate with each other.
This is very important if you have more than one fan of the same type in your house.
If they are all on the same frequency, one remote might turn on all your fans at once.
To fix this, you need to adjust the frequency switches on both the remote and the receiver box to give each fan its own unique channel.
The receiver is connected directly to your home’s power supply, typically with three wires: a neutral wire, a high-power wire for the fan, and a wire for the light kit if your fan has one.
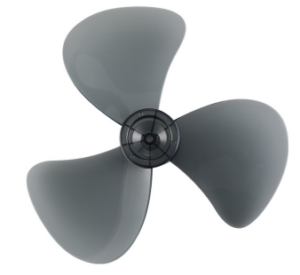
The Motor and Its Components
The motor is the heart of your ceiling fan.
It’s a heavy component, also found under the fan housing, that does all the work of spinning the blades.
The fan blades are attached directly to mounts on the motor.
The motor also contains several important parts:
- Wiring Harnesses: These are bundles of wires that manage power for different functions, like the fan’s light and the reversing switch.
- Reversing Switch: This switch is a key feature that changes the direction the blades spin. In the summer, you want the fan to spin counter-clockwise to push air down and create a cooling breeze. In the winter, you can reverse it to spin clockwise, which pulls cool air up and helps circulate the warm air trapped near the ceiling.
- Safety Wire: This is a crucial safety feature. The wire is secured by the receiver box and acts as a backup to prevent the entire fan from falling if it ever comes loose from its ceiling mount.
Ball Bearings
Inside the motor, on either end, you will find ball bearings.
These small parts help the motor spin smoothly and quietly.
Ball bearings are very durable and can last for many years without any issues.
However, after a long time and lots of use, they can wear down.
When this happens, you might start to hear a loud grinding or scraping noise coming from the fan.
While you can replace them, it’s often more expensive and difficult than simply buying a new fan, so at that point, a replacement is usually recommended.
The Capacitor
The capacitor is a small, typically black, box-shaped part that plays a huge role.
It’s located within the fan housing, usually below the motor but above the light fixture.
Its main job is to give the motor the boost it needs to start running and to control the speed.
If your capacitor becomes faulty, you’ll notice some clear signs.
The fan might not respond to your remote’s commands, or the blades may spin very slowly, even on the highest setting.
Can You Add a Remote to Any Ceiling Fan?
Do you have an older fan that you love, but you’re tired of using the pull cord?
It feels outdated and inconvenient.
The good news is you can easily upgrade it.
Yes, you can add remote control functionality to almost any existing ceiling fan by installing a universal remote control kit.
These kits come with a handheld remote and a receiver unit that you install inside the fan’s canopy.
Adding a remote is a fairly simple process that can modernize your fan and add a huge amount of convenience.
It’s a popular DIY project for homeowners.
Before you start, it’s important to understand what these kits include, how they are installed, and what you need to consider to make sure the upgrade is successful.
How Universal Kits Work
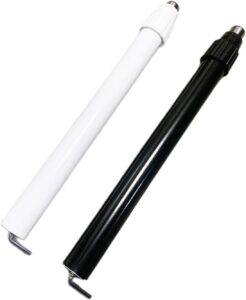
A universal remote kit has two main parts: the transmitter and the receiver.
- The Transmitter: This is the remote control you hold in your hand. When you press a button, it sends out a command using a specific radio frequency (RF) signal. RF is useful because it can pass through walls and doesn’t require you to point the remote directly at the fan.
- The Receiver: This is a small box that you install inside the fan’s mounting bracket or canopy. It has an antenna that “listens” for the signal from the remote. When it receives a command, it decodes the signal and tells the fan what to do by controlling the flow of electricity to the fan motor or light.
These kits are called “universal” because they are designed to work with a wide variety of fan makes and models.
The Installation Process
Installing a receiver is a project that requires basic wiring knowledge.
You will need to turn off the power to the fan at the circuit breaker first for safety.
The general steps are:
- Lower the fan’s canopy to access the wiring.
- Disconnect the existing wiring between your house’s power supply and the fan.
- Connect the receiver’s input wires to the house wiring.
- Connect the receiver’s output wires to the fan’s motor and light wiring.
- Tuck the receiver and wires neatly into the canopy or mounting bracket.
- Close everything up and restore power to test the remote.
It’s a straightforward process, but if you are not comfortable with electrical wiring, it’s always best to consult an electrician.
What to Consider Before Upgrading
Before you buy a kit, think about these points:
- Control Type: You cannot use both a remote control and a wall speed controller for the same fan. You must choose one. If your fan has a pull cord, you should leave it on the highest speed setting and use the remote to control the speeds from there.
- Fan Type: Almost any standard AC motor fan can be retrofitted. However, DC ceiling fans are different. They are remote-controlled only and already come with a specific remote they are paired with; you cannot use a universal kit on a DC fan.
- Features: Different remote kits offer different features. All will control 3 speeds and a light, but some also offer dimming for the lights or a timer for the fan. Decide what features you want before you purchase.
Troubleshooting Common Ceiling Fan Issues
Your fan is making a strange noise or shaking.
This is not only distracting but also makes you worry if it’s safe.
Let’s look at the simple reasons this might be happening.
Many common ceiling fan problems are related to noise, shaking, or flickering lights.
These are usually caused by parts becoming unbalanced, blades getting damaged, or simple electrical issues that can often be fixed easily.
While a faulty fan can be annoying, most problems have simple solutions.
By identifying the symptom, you can often trace it back to a specific cause and find a fix without needing to call a professional.
Here is a breakdown of the most frequent issues and what you can do about them.
Problem 1: Unpleasant Noises
Noises are a common complaint, but the type of sound can tell you what the problem is.
- Clicking or Hitting Sounds: If you hear parts hitting each other, it’s often because the fan has become unbalanced over time. The blades or even the receiver box in the housing may have shifted slightly.
- Solution: Turn off the power. Check that all screws on the fan blades and housing are tight. Make sure no wires are in the way of the rotating parts.
- Grinding or Scraping Sounds: This sound often points to the motor’s ball bearings. This can happen when the bearings are old and worn down, or if they have become dirty or are not lubricated enough.
- Solution: Sometimes, cleaning and lubricating the bearings can solve the problem. However, if the bearings are worn out, they need to be replaced, which can be an expensive repair.
Problem 2: Instability and Shaking
A wobbling fan is one of the most common issues people face.
It looks alarming, but the cause is usually straightforward.
- Poor Installation: If the fan was not installed properly on the ceiling, it will not be stable and can shake. The mounting bracket must be attached securely to a ceiling joist.
- Damaged Blades: One or more of the fan blades may be warped, cracked, or damaged in some way. This throws off the balance of the entire fan, causing it to wobble as it spins.
- Poor Quality: Sometimes, the fan itself is of poor quality, and the parts are not well-balanced from the factory.
Solutions for Shaking:
- Check the Mounting: Make sure the fan is securely attached to the ceiling box and that the box itself is rated for a ceiling fan and doesn’t move.
- Inspect the Blades: Look for any visible damage on the blades. You can also measure the distance from the tip of each blade to the ceiling. If one is higher or lower than the others, it can cause a wobble.
- Use a Balancing Kit: Most fans come with a balancing kit, which includes small weights you can attach to the blades to correct any imbalances.
Problem 3: Flickering Lights
If your fan has a light fixture, flickering is another potential issue.
- Simple Cause: The most common reason is that the light bulb is loose or needs to be replaced, just like any other light in your house.
- Electrical Issue: If a new bulb doesn’t solve it, the flickering could point to a bigger problem. It might be a poor connection between the bulb socket and the fan’s wiring.
- Overload: If the light flickers only when you use another appliance, it could be a sign of an electrical overload on that circuit.
Solution: For a simple bulb issue, just replace it. However, if you suspect a wiring problem or circuit overload, it is safest to call a qualified electrician to diagnose and fix the issue.
Ceiling Fan Benefits: Style and Savings
Your air conditioner runs all summer, and your power bills are too high.
It’s expensive and not very eco-friendly.
A ceiling fan is a smart, stylish, and affordable solution.
Ceiling fans offer a budget-friendly way to cool your home compared to HVAC systems.
They use less energy, which helps you save money on power bills, and they come in many styles to match your home’s decor.
Beyond just moving air, ceiling fans provide a range of advantages that make them a valuable addition to almost any room.
They are not only practical but also an environmentally conscious choice.
Let’s explore the key benefits that make ceiling fans so popular.
They Are Budget-Friendly
One of the biggest advantages of a ceiling fan is the cost savings.
- Lower Initial Cost: Ceiling fans are much cheaper to buy and install than a central air conditioning system.
- Energy Efficiency: They consume significantly less electricity than an HVAC unit. This can lead to a noticeable reduction in your monthly power bills. By using a fan, you can turn your thermostat up a few degrees without feeling a difference in comfort.
- Blade Size Matters: For even greater efficiency, choose a fan with longer blades. Longer blades can move more air while using less power from the motor, maximizing the energy savings.
They Are Environmentally Friendly
If you’re looking to make your home a bit greener, a ceiling fan is an excellent choice.
- No Harmful Emissions: Unlike some HVAC systems that can release pollutants like carbon monoxide and nitrogen oxide, ceiling fans do not emit anything harmful into the atmosphere.
- Reduced HVAC Usage: By relying more on ceiling fans for cooling, you can lower your overall use of your HVAC system. This reduces your home’s carbon footprint and energy consumption.
They Add Style
Ceiling fans have evolved from purely functional appliances into design elements.
- Variety of Designs: Today, you can find fans in countless styles, from modern and contemporary to classic and rustic. You can choose the material, finish, lighting, and design that perfectly complements the decor in your home.
- Smart Technology: For those who are tech-savvy, many companies now offer smart fans. These can be controlled from an app on your phone or computer, or even integrated into your smart home system.
They Are Useful for Indoor and Outdoor Spaces
The versatility of ceiling fans extends beyond the living room or bedroom.
- Outdoor Fans: Many fans are specifically designed and rated for outdoor use. You can install them in a covered gazebo, porch, or deck to create a comfortable breeze on warm days.
- Wet-Rated Fans: If your outdoor space is exposed to the elements, look for a “wet-rated” ceiling fan. These models are built with materials that are resistant to rain and snow and will not corrode in harsh weather conditions.
Conclusion
Remote control fans work with a transmitter and receiver to offer convenience.
Understanding their parts helps with maintenance, and they offer great benefits for any home.
Frequently Asked Questions (FAQs)
Q1. How do you sync a remote to a ceiling fan?
To sync a remote, you often need to set matching DIP switches inside both the remote’s battery compartment and the fan’s receiver.
Some modern fans use a “pairing” button instead.
Q2. Do ceiling fan remotes use IR or RF?
Most modern fan remotes use Radio Frequency (RF) because it doesn’t require a direct line of sight.
Older or simpler models might use Infrared (IR), which works like a TV remote.
Q3. Why is my ceiling fan not responding to the remote?
First, check the remote’s batteries.
If that’s not the issue, ensure the DIP switches match or try re-pairing the remote.
The fan’s receiver could also be faulty.
Q4. Do remote control ceiling fans need a special wall switch?
No, they work with a standard ON/OFF wall switch.
You should not use them with a dimmer or variable speed wall switch, as this can damage the fan’s motor or receiver.
Q5. Can I use my phone to control my ceiling fan?
You can if you have a “smart” ceiling fan designed for it.
Otherwise, you would need to buy a separate smart fan controller that connects to your Wi-Fi network.
Q6. What happens if I lose my ceiling fan remote?
You can often buy a universal ceiling fan remote kit.
These come with a new remote and a matching receiver that you can install in your fan.
Q7. How far does a ceiling fan remote signal reach?
Typically, the signal for a ceiling fan remote can reach from 30 to 40 feet.
Walls and other large obstructions can sometimes reduce this effective range.
Q8. Can a remote control be added to a pull chain fan?
Yes, a universal remote kit can be added to most pull chain fans.
Once installed, you should leave the fan’s pull chain set to its highest speed.