That sticky layer on your kitchen fan is more than just ugly.
It’s a fire risk and hurts your kitchen’s air quality.
But the good news is that cleaning it is simple.
To clean a greasy kitchen fan, start by unplugging it.
Next, remove the metal filter and soak it in hot water with dish soap and baking soda.
Scrub the filter gently, rinse it with hot water, and let it dry completely before putting it back.
Getting your fan back to new isn’t hard.
This guide will walk you through every step.
You’ll learn why cleaning is so important, how often you should do it, and the best ways to get rid of tough grease.
Why Cleaning Your Kitchen Fan Is So Important
You might ignore that dirty fan, but built-up grease is a serious fire hazard.
It also makes your fan work poorly, which leaves bad smells and smoke in your kitchen.
Regularly cleaning your kitchen fan is crucial to prevent dangerous fire hazards caused by grease buildup.
It also improves your kitchen’s air quality and helps the fan last longer and run more efficiently.
A clean fan is a safe and effective fan.
Over time, the fan pulls in grease, smoke, and food particles from your cooking.
This grime builds up on the filter, the fan blades, and inside the hood.
Understanding the risks of a dirty fan makes it easier to add this task to your regular cleaning routine.
Prevent Fire Hazards
The number one reason to clean your fan is safety.
The grease that collects in the exhaust system is very flammable.
If a fire starts on your stovetop, it can easily spread up into the greasy vent, causing a much larger and more dangerous fire.
A clogged filter also blocks airflow, which can make the fan motor overheat, adding another fire risk.
This danger is so real that commercial kitchens are required to follow strict cleaning schedules to prevent fires.
Regular cleaning removes this fuel source and keeps your home and family safe.
Improve Air Quality
Your exhaust fan’s main job is to pull smoke, steam, heat, and cooking odors out of your kitchen.
When the filter and fan are clogged with grease, they can’t do this job well.
This means smoke and other pollutants stay in the air you breathe.
This can be unhealthy and make your home uncomfortable.
Furthermore, the old grime stuck in the fan can become a breeding ground for bacteria, which can lead to bad smells even when you aren’t cooking.
Extend Your Fan’s Life
A dirty fan has to work much harder to move air.
The motor strains to pull air through a filter that is blocked with grease and dirt.
This extra effort can cause the motor to wear out more quickly, leading to expensive repairs or a full replacement.
By keeping the fan clean, you allow it to run smoothly and efficiently, which helps it last for many years.
How Often Should You Clean Your Kitchen Fan?
Not sure when to clean your fan?
Waiting too long creates a bigger, greasier mess.
But cleaning too often is a waste of your time.
Let’s find the right schedule for you.
The cleaning frequency depends entirely on your cooking habits.
If you cook daily, you should clean your fan every month.
For moderate cooking, a deep clean every three to six months is good.
If you hardly ever cook, an annual cleaning is often enough.
Knowing the right time to clean your exhaust fan can save you from a huge cleaning job later.
Instead of just guessing, you can look for clear signs that it’s time for a cleaning.
You can also set a schedule based on how much you cook.
This approach ensures your fan is always working well without you having to clean it more than necessary.
Signs Your Fan Needs Cleaning
Your fan will give you clues when it needs attention.
Here are a few things to watch for:
- Lingering Smoke: If your kitchen stays smoky long after you’ve finished cooking, your fan isn’t pulling air effectively.
- Loud Noises: A fan that is louder than usual might have a motor that is straining to work through all the grime.
- Bad Smells: If you notice a foul or greasy smell coming from the vent even when it’s off, it’s a sign of old grease buildup.
- Visible Grime: The most obvious sign is seeing a sticky, yellowish layer of grease on the hood or the filter.
- The Newspaper Test: Turn your fan on its highest setting.
Hold a piece of newspaper up to the vent.
If the fan’s suction can’t hold the paper in place, it’s too weak and needs to be cleaned.
Creating a Cleaning Schedule
A simple schedule can help you stay on top of this chore.
Here is a guide based on cooking frequency:
- Heavy Use (Daily Cooking): If you cook most days, especially if you fry food often, a monthly cleaning is best.
This stops the grease from building up and becoming hard to remove.
- Moderate Use (A few times a week): If you cook several times a week, a deep clean every three months is a good rule.
For less greasy cooking, you can stretch this to every six months.
- Light Use (Rarely cook): If you use your kitchen mostly for simple meals and don’t cook often, cleaning your fan once a year should be enough to keep it in good shape.
You don’t have to do a deep clean every time.
Wiping the outside of the hood with a damp cloth every week can prevent sticky dust from forming and make deep cleaning much easier.
How to Clean Your Kitchen Fan: The Full Guide
Facing a super greasy fan can feel overwhelming.
You might worry about damaging it or not getting it truly clean.
But you don’t need special skills or expensive cleaners to do it right.
For a deep clean, unplug the unit.
Remove the metal filter and soak it in a solution of hot water, baking soda, and dish soap for 15-30 minutes.
Then, gently scrub it, rinse it well, and let it air dry completely before reassembling.
This step-by-step process breaks down the deep cleaning into simple, manageable tasks.
With just a few common household items, you can get rid of even the toughest grease and make your exhaust fan look and work like new.
Follow these instructions carefully for a safe and effective clean.
Step 1: Prepare and Stay Safe
Before you do anything else, make safety your priority.
- Turn off the power. Unplug the exhaust fan or the stove it’s attached to.
For extra safety, turn off the power at the circuit breaker.
- Let it cool. If you just finished cooking, wait until the stovetop and the fan are completely cool to the touch.
- Protect your stove. Lay an old towel over your cooktop to protect it from drips and any parts you might drop.
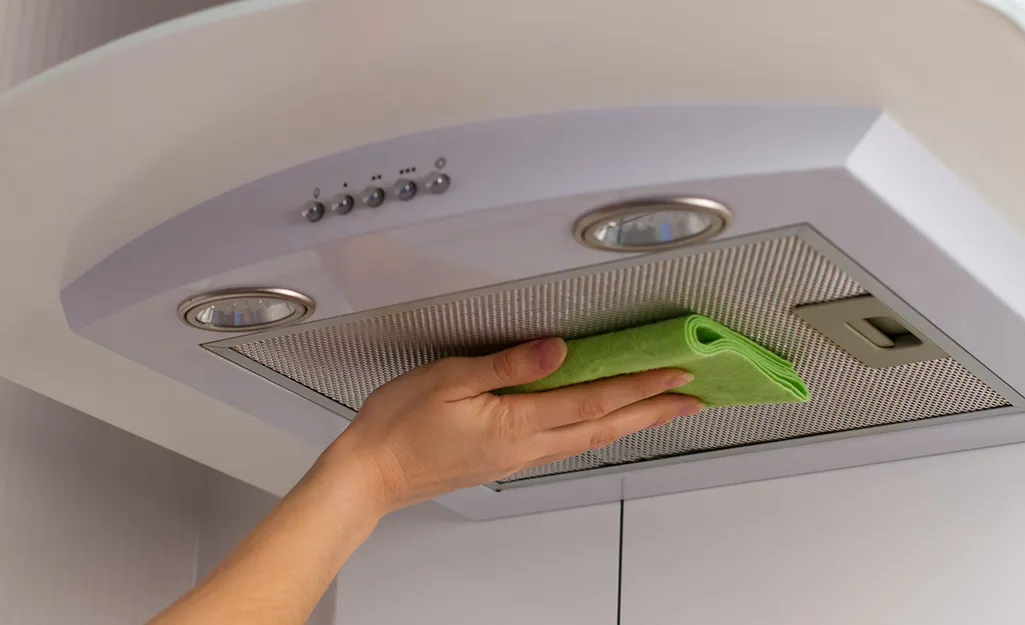
Step 2: Remove and Soak the Filter
The filter does most of the work, so it’s usually the dirtiest part.
- Take out the filter. Most filters are easy to remove. Look for a small handle, loop, or tab that you can pull or slide to release it. If it’s stuck, gently run a butter knife around the edges to loosen the old grease.
- Prepare the soak. Find a sink or a pan large enough to hold the filter. Fill it with very hot or boiling water. Add a good squirt of dish soap and about 1/4 cup of baking soda.
- Let it soak. Submerge the greasy filter in the solution. Let it sit for 15 to 30 minutes. You should see the grease start to melt away into the water. For very dirty filters, you may need to let it soak for up to an hour.
Step 3: Scrub, Rinse, and Dry
After soaking, it’s time to remove the leftover grime.
- Scrub gently. Use a soft brush or a non-abrasive sponge to scrub both sides of the filter. The soaking should have done most of the work, so you shouldn’t need to scrub hard.
- Rinse well. Rinse the filter under hot running water to wash away all the soap and remaining grease.
- Dry completely. Shake off any extra water and let the filter air dry completely. Do not use a towel, as lint can get stuck in the mesh. It’s very important that the filter is 100% dry before you put it back to prevent electrical problems.
Step 4: Clean the Fan and Hood
While the filter is drying, you can clean the rest of the unit.
- Wipe the inside. Use the same soap and baking soda solution on a damp cloth or sponge. Wipe down the inside of the hood and the fan blades to remove any grease.
- Never pour liquid. Do not pour or spray cleaner directly onto the fan motor or electrical parts. This can cause serious damage.
Step 5: Reassemble
Once every part is clean and completely dry, it’s time to put it all back together.
- Replace the filter. Slide the clean, dry filter back into its place, making sure it locks securely.
- Restore power. Plug the unit back in or turn the circuit breaker back on.
- Test it. Turn the fan on to make sure everything is working correctly.
How to Clean the Fan Without Removing It
Sometimes you can’t easily take the fan apart, or you might be short on time.
Don’t worry, you can still give it a good clean without a full disassembly.
For a quick clean, turn off the power.
Remove only the outer vent cover.
Vacuum the cover and the fan blades using a brush attachment.
Then, wipe everything down with a damp microfiber cloth and a gentle degreaser.
This method is perfect for the light-duty cleaning you do between deep soaks.
It’s a great way to manage dust and prevent the kind of heavy grease buildup that makes deep cleaning a much bigger job.
While it won’t replace the need for an occasional deep clean, regular light cleaning can make a big difference in how well your fan works and how clean your kitchen air is.
It’s a fast and easy process that anyone can do.
When to Use This Method
This quick-clean method is not a full replacement for a deep clean, but it’s very useful in a few situations:
- For regular maintenance. Doing this once a month can reduce how often you need to do a full soak.
- When you’re short on time. It only takes a few minutes and is much faster than a deep clean.
- For hard-to-remove fans. If your fan model is complicated or difficult to take apart, this may be your best option for regular cleaning.
Step-by-Step Quick Cleaning Guide
Follow these simple steps for an effective clean without taking everything apart.
- Power Off. This is always the first and most important step.
Make sure the fan is turned off, and unplug the unit or switch off the circuit breaker that controls it.
- Clean the Cover. Carefully remove the outer vent cover or filter mesh.
Use a vacuum cleaner with a brush attachment to get rid of any loose dust.
After vacuuming, wipe it down with a damp cloth soaked in warm, soapy water.
Set it aside to air dry completely.
- Vacuum the Interior. Attach a crevice tool or a small brush attachment to your vacuum cleaner.
Carefully reach up into the fan housing and vacuum the fan blades and the area around the motor.
This will remove a surprising amount of dust and dry, cakey grime.
- Wipe It Down. Never spray any cleaning solution directly into the fan.
Instead, spray a small amount of a gentle degreaser or all-purpose cleaner onto a clean microfiber cloth.
Use the damp cloth to carefully wipe the fan blades and any other surfaces you can reach.
- Reassemble. Once the cover is fully dry, reattach it to the fan housing.
Make sure it’s secure.
You can now restore power and use your fan again.
Conclusion
Now you know how to clean your greasy kitchen fan.
A little regular cleaning keeps your kitchen safer, smelling better, and your fan working well for years to come.
Frequently Asked Questions
What is the best cleaner for a greasy kitchen fan?
A simple mix of hot water, dish soap, and baking soda is a powerful homemade degreaser.
It effectively cuts through grease without using harsh chemicals.
Can you put exhaust fan filters in the dishwasher?
Some metal filters are dishwasher-safe, but not all of them are.
You should always check the owner’s manual for your fan first to avoid damaging the filter.
How do you get rid of the smell in a kitchen exhaust fan?
Cleaning the filter and fan blades usually removes bad smells.
The baking soda used in the cleaning solution is great for neutralizing odors trapped in old grease.
What’s the difference between a charcoal filter and a metal filter?
Metal filters are designed to trap grease; they can be washed and reused many times.
Charcoal filters are designed to absorb odors, cannot be washed, and must be replaced every 6 to 12 months.
Why is my exhaust fan dripping grease?
This is a clear sign of extreme grease buildup.
The filter is so saturated with grease that it can no longer hold it all, which means it needs an immediate and thorough deep cleaning.
Do I need to clean the ductwork too?
For most homes, cleaning the filter and the fan itself is enough.
The ducts rarely need cleaning unless you notice a major blockage or a very strong smell that doesn’t go away after cleaning the fan.