Is your ceiling fan moving slower than usual? Don’t sweat it! A slow fan can be frustrating, especially during hot weather. We can help you figure out the problem.
A slow ceiling fan is often caused by dust buildup, a bad capacitor, worn bearings, loose parts, or electrical issues. These problems prevent the fan from reaching its normal speed and circulating air effectively.
Understanding why your fan has slowed down is the first step to fixing it. Let’s explore the common reasons and how you can get your fan back up to speed for a cooler room.
Dust and Dirt Build-Up on Fan Blades
Fan blades covered in dust? This common issue slows your fan down, making your room feel stuffy. Let’s see how dust affects performance and how to fix it.
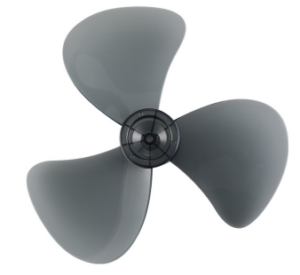
Dust adds weight and creates uneven resistance on fan blades. This forces the motor to work harder, reducing speed and airflow. Regular cleaning is essential for optimal performance.

Dust might seem harmless, but it’s a major enemy of ceiling fan efficiency. As your fan spins, the blades cut through the air. Over time, tiny particles of dust, pollen, and other debris floating in the air stick to the leading edges and surfaces of the blades. This buildup doesn’t just look bad; it actively harms performance. The accumulated dust adds extra weight to each blade. While a tiny amount of dust isn’t heavy, layers of it can create a noticeable burden. More importantly, the dust layer disrupts the smooth aerodynamic shape of the blade. This increases drag, meaning the blade faces more resistance as it tries to move through the air. The motor has to work harder to overcome both the extra weight and the increased drag. This extra effort translates directly into slower rotation speed. A slower fan moves less air, reducing the cooling effect you rely on. Furthermore, thick dust layers can become unbalanced, contributing to wobbling, which puts further strain on the motor and mountings. Dirty blades also impact your home’s air quality, recirculating dust particles every time the fan is on. Keeping the blades clean is crucial not just for speed, but for the fan’s longevity and a healthier environment.
How to Clean Your Fan Blades Safely
Cleaning your fan blades is a simple task that can make a big difference. First and foremost, ensure safety. Turn off the ceiling fan using both the pull chain/remote and the wall switch. It’s best to also turn off the power at the circuit breaker to completely eliminate any risk of the fan accidentally turning on while you work. Use a sturdy stepladder placed on level ground. Never stand on furniture. For cleaning, the ‘pillowcase method’ is very effective and minimizes mess. Take an old pillowcase and slide it over one blade. Gently press the pillowcase against the top and bottom surfaces of the blade and slide it back off. The dust gets trapped inside the pillowcase instead of falling onto your floor or furniture. Repeat for each blade. Alternatively, you can use a damp microfiber cloth or specialized fan blade duster. Avoid spraying cleaners directly onto the fan motor housing. After dusting, you can wipe the blades with a slightly damp cloth for a more thorough clean, then dry them with another cloth. How often should you clean? Aim for every 2-3 months, or more often if you live in a dusty area or have allergies. Regular cleaning prevents significant buildup and keeps your fan running efficiently.
Issues with the Capacitor
Is your fan struggling to start or spinning slower than it used to? The problem might be a small but vital part: the capacitor. Let’s explore this common issue.
The capacitor gives the fan motor the boost it needs to start and run at the correct speeds. If it fails, the fan may run slowly, inconsistently, or not start at all.

Deep inside your ceiling fan’s motor housing sits the capacitor. It might not look like much, often just a small black box with wires, but it plays a crucial role. Think of it like a tiny battery that provides a jolt of energy to get the motor spinning and then helps regulate the power flow to maintain different speeds. Most ceiling fans use a dual run capacitor, meaning it has sections to help both start the motor and run it efficiently at various speed settings. When this component starts to degrade or fail, the fan loses its ability to perform correctly. Capacitors wear out over time due to factors like heat generated by the motor and electrical fluctuations. A failing capacitor might not provide enough initial torque, leading to a fan that struggles to start spinning or needs a manual push. Once running, it might only operate at a low speed, regardless of the setting selected, or the speeds might fluctuate unpredictably. Sometimes, a bad capacitor can cause the motor to hum loudly without the blades turning. Because it’s such a common failure point (responsible for a large percentage of speed issues), checking the capacitor is often a key step in diagnosing a slow fan.
Identifying a Faulty Capacitor
Pinpointing a bad capacitor isn’t always straightforward without testing equipment, but certain signs strongly suggest it’s the culprit. If your fan starts very slowly, hums before starting, or requires a push to get going, the start winding part of the capacitor might be weak. If the fan runs noticeably slower than usual on all speed settings, or if some speed settings don’t work at all (e.g., high speed is the same as medium), the run windings might be affected. A visual inspection can sometimes help, although not always. Look for bulging, leaking oil, or burn marks on the capacitor casing. However, a capacitor can fail internally without showing any external signs. If you experience these symptoms, especially after checking for simpler issues like dust buildup, the capacitor becomes a prime suspect. An electrician can test the capacitor’s microfarad (µF) rating using a multimeter to confirm if it’s within the specified tolerance (usually +/- 5-10% of the rating printed on it).
Replacing the Capacitor (Safety First!)
Replacing a capacitor involves working with electrical wiring and components. Safety is paramount. Always turn off power to the fan at both the wall switch and the circuit breaker before opening the motor housing. Capacitors can store an electrical charge even when the power is off, so they need to be discharged safely (a task best left to someone with experience). While replacing a capacitor might seem simple – disconnecting wires from the old one and connecting them to the new one – using the wrong replacement or wiring it incorrectly can damage the fan motor or create a fire hazard. The replacement capacitor must match the original’s microfarad (µF) rating, voltage rating, and number of terminals. Due to the electrical risks involved, it is strongly recommended to hire a licensed electrician for capacitor testing and replacement. They have the tools and knowledge to do the job safely and correctly, ensuring your fan runs smoothly again.
Loose or Worn Motor Bearings
Hear strange noises from your fan? Grinding or humming sounds often point to bearing problems, slowing down your fan and causing potential damage. Let’s investigate this mechanical issue.
Motor bearings allow the fan to spin smoothly. When they wear out, loosen, or lack lubrication, friction increases. This forces the motor to work harder, slowing the fan and causing noise.

Inside your fan’s motor, small components called bearings play a big role. They are usually ball bearings – sets of small steel balls held in rings – that allow the central shaft of the motor to rotate freely with minimal friction. Smooth rotation is essential for the fan to reach and maintain its intended speed. However, like any mechanical part, bearings can wear out over time. Constant rotation, heat from the motor, and environmental factors like dust can degrade them. As bearings wear, the smooth surfaces can become rough or pitted, increasing friction. Sometimes, the bearings themselves can become loose within their housing. This extra friction means the motor has to expend more energy just to turn, which directly leads to a slower fan speed. Worn bearings are often accompanied by noticeable noises, such as grinding, scraping, or a persistent humming sound that changes pitch with fan speed. Ignoring these signs can lead to further damage to the motor itself.
Signs of Bearing Problems
How can you tell if bearings are the issue? Listen closely. A healthy fan should operate relatively quietly, with mostly the sound of air movement. If you hear distinct mechanical noises like grinding, clicking, scraping, or a loud hum that wasn’t there before, worn bearings are a likely cause. Another sign is increased wobbling or vibration, although this can also be caused by unbalanced blades. Difficulty starting, or a fan that spins much slower than its setting suggests, can also point towards bearing friction. If the fan blades feel stiff or difficult to turn by hand (with the power completely off!), it’s a strong indicator of bearing resistance. Dust and debris accumulation within the bearing assembly is a common contributor to wear and friction, making regular cleaning important, though internal bearings are often sealed.
Lubrication and Maintenance
Proper lubrication is vital for bearing longevity. Bearings need oil or grease to reduce friction and dissipate heat. Many modern ceiling fans come with sealed bearings that are considered ‘lubricated for life’ and don’t require additional oiling. However, older fans, or some specific models, might have oil ports or reservoirs. If your fan manual mentions lubrication, follow the manufacturer’s instructions carefully. Typically, this involves adding a specific weight of non-detergent electric motor oil (usually 10, 15, or 20-weight) annually or biannually. Over-lubricating can be as bad as under-lubricating, as excess oil can attract dust and potentially damage motor windings. If your fan has sealed bearings and they start making noise or causing slowdowns, they generally need to be replaced, not just lubricated. Due to the complexity of accessing and replacing motor bearings, this task is almost always best left to a qualified technician or might even necessitate replacing the entire fan if it’s an older, less valuable model.
Electrical Connection Issues
Fan speed suddenly dropped or acting erratically? Sometimes the problem isn’t the fan itself, but the wires connecting it. Loose or faulty wiring can disrupt power flow.
Loose, corroded, or improperly installed wiring can restrict the electricity reaching the fan motor. This leads to reduced power, slower speeds, and potentially hazardous conditions.

Your ceiling fan relies on a steady flow of electricity to operate correctly. This electricity travels through wires from your home’s circuit breaker, through the wall switch, up into the ceiling junction box, and finally into the fan’s motor. Problems can arise anywhere along this path. Over time, vibrations from the fan’s operation or settling of the house can cause wire connections to loosen. Wire nuts, which are commonly used to join wires, might become loose, creating a poor or intermittent connection. Corrosion can also occur, especially in humid environments or if there was previous water damage near the ceiling box. Corroded wires increase resistance, hindering the flow of electricity. Improper installation is another potential cause; wires might not have been stripped correctly, secured tightly, or the wrong gauge wire might have been used initially. Even a slightly loose connection can significantly impact the voltage reaching the fan motor. Reduced voltage means the motor doesn’t get the power it needs to spin at its designed speeds, resulting in sluggish performance. Flickering lights when the fan is turned on, or a fan that works intermittently, can also be signs of connection problems. These issues aren’t just inconvenient; faulty wiring poses a serious fire risk and should be addressed immediately by a professional.
Troubleshooting Wiring (Professionals Recommended)
Diagnosing electrical connection issues requires caution and expertise. Working with electrical wiring is dangerous if you are not trained. Always turn off power at the circuit breaker before inspecting any wiring. A visual inspection inside the ceiling canopy (where the fan attaches to the ceiling box) might reveal obviously loose wire nuts or disconnected wires. Check connections at the wall switch as well. Look for any signs of scorching, melting, or corrosion on wires and connection points. However, many connection problems aren’t visible to the naked eye. An electrician uses tools like a multimeter to test voltage levels at the fan and switch, check for continuity, and identify resistance issues. They can ensure all connections are secure, properly insulated, and meet electrical code requirements. If you suspect a wiring problem, especially if the fan is old, was installed DIY, or if you notice flickering lights or burning smells, do not attempt repairs yourself. Call a licensed electrician to safely diagnose and fix the issue.
Importance of Proper Installation
Many electrical connection problems stem from incorrect initial installation. Using the correct wire gauge, ensuring all connections are tight and secure within wire nuts, properly grounding the fan, and securing the fan mounting bracket firmly to a ceiling joist or fan-rated box are all critical steps. If the fan wobbles excessively due to improper mounting, this vibration can eventually loosen electrical connections over time. Ensuring the fan is installed according to the manufacturer’s instructions and local electrical codes is the best way to prevent future connection issues and ensure safe, efficient operation for years to come.
Blades That Cause Wobbling
Does your fan shake or wobble violently? This isn’t just annoying; it can slow the fan down and even be dangerous. Unbalanced blades are often the culprit.
Bent, warped, or improperly secured fan blades create an imbalance. This causes wobbling, puts strain on the motor, reduces efficiency, and slows the fan speed significantly.

A ceiling fan needs to be perfectly balanced to spin smoothly and efficiently at high speeds. Each blade must be identical in weight, shape, and angle (pitch) to its counterparts. When one or more blades are bent, warped, damaged, or even just slightly heavier than the others, the fan’s center of gravity shifts as it rotates. This creates an imbalance, much like an unbalanced tire on a car. The result is wobbling – the entire fan assembly shakes or oscillates as it spins. This wobbling isn’t just a visual or auditory nuisance; it directly impacts performance. The motor has to fight against the uneven forces, consuming extra energy and putting significant strain on the bearings and mounting hardware. This extra work slows the fan’s rotation. Furthermore, severe wobbling can loosen screws and electrical connections over time, leading to further problems or even safety hazards if the fan were to detach from its mounting. Causes of imbalance include blades getting bent during cleaning or installation, warping due to humidity or age, manufacturing defects, or even loose screws attaching the blades to the blade arms (brackets) or the arms to the motor.
Identifying and Fixing Blade Imbalance
Diagnosing blade imbalance often starts with observation. Does the fan visibly shake or wobble, especially at higher speeds? Is the wobbling accompanied by rattling or clicking sounds? First, ensure the fan is securely mounted to the ceiling box and that the box itself is rated for fan support and firmly attached to a joist. Check that the canopy cover is snug against the ceiling. Next, turn off the power completely (at the breaker). Inspect each blade carefully. Look for any visible bends, cracks, or warping. Check that all screws attaching the blades to the blade arms (brackets) are tight. Also, ensure the screws connecting the blade arms to the motor housing are secure. Sometimes, simply tightening loose screws can resolve wobbling. If blades appear damaged, they often need to be replaced. It’s crucial to replace them with identical blades from the manufacturer to maintain balance; mixing blade types or sizes will worsen the problem.
Using a Balancing Kit
If tightening screws and visual inspection don’t reveal an obvious cause, or if minor wobbling persists, a ceiling fan balancing kit can often solve the problem. These kits are inexpensive and typically include a plastic clip and several small adhesive weights. The process involves attaching the clip to the trailing edge of one blade and running the fan to see if the wobble improves or worsens. You move the clip from blade to blade, and along the edge of the blade, until you find the spot where the clip most effectively reduces the wobble. Once you identify the problematic blade and the best position for the weight, you remove the clip and attach one of the adhesive weights to the top center of the blade at that location. You might need to add more than one weight or experiment slightly with placement for optimal balance. While it takes some trial and error, balancing kits are very effective at correcting minor imbalances and restoring smooth, efficient operation.
Lack of Lubrication
Is your fan running rough or slower than before? Proper lubrication is key for smooth operation, but many fans need specific care. Let’s see if this is slowing yours down.
Some fans require periodic oiling for their bearings. If lubrication dries up or is insufficient, friction increases, slowing the fan and potentially damaging the motor.

While closely related to bearing wear, lack of lubrication deserves its own focus, especially for older fan models. The bearings within the motor rely on a thin film of oil or grease to allow the metal parts to glide past each other with minimal friction. This lubrication reduces heat buildup and prevents premature wear. However, over time, this lubricant can dry out, break down due to heat, or become contaminated with dust and debris. When this happens, friction within the bearing assembly increases dramatically. The motor must work significantly harder to overcome this resistance, leading directly to a reduction in rotational speed. In severe cases, the lack of lubrication can cause the bearings to seize up entirely, stopping the fan altogether. It’s important to note that many modern ceiling fans are designed with sealed bearings that are permanently lubricated and do not require (and should not receive) additional oiling. Attempting to oil sealed bearings can actually damage them by introducing contaminants or incompatible lubricants. Always consult your fan’s manual first.
Does Your Fan Need Oiling?
The first step is determining if your fan is designed for periodic lubrication. Check the owner’s manual or look up the model online. Fans requiring oil typically have a small hole labeled “Oil Hole” or similar on the top of the motor housing, near the downrod. If you see such a port, your fan likely needs oiling. If there’s no oil hole and the manual doesn’t mention lubrication, your fan probably has sealed bearings. Do not attempt to force oil into a fan with sealed bearings. For fans that do require oiling, the manufacturer usually specifies the type and weight of oil (commonly SAE 10, 15, or 20 non-detergent electric motor oil) and the recommended frequency (often annually or semi-annually). Using the wrong type of oil (like WD-40 or automotive oil) can damage the motor windings or bearings.
How to Lubricate (If Applicable)
If your fan requires oiling, follow these steps carefully. First, turn off the power at the switch and breaker. Place cloths below the fan to catch any drips. Locate the oil hole. Clean any dust away from the hole. Add the manufacturer-recommended amount of the correct oil (usually 1-2 ounces or until the reservoir is full). Do not overfill, as excess oil can cause problems. After adding oil, manually rotate the fan blades slowly several times to help distribute the lubricant within the bearings. Wipe away any excess oil from the motor housing. Restore power and test the fan. If lack of lubrication was the primary issue, you should notice an improvement in speed and potentially quieter operation. If the fan still runs slow or makes noise, other issues like worn bearings or capacitor problems might be present.
Conclusion
Several factors like dust, bad capacitors, worn bearings, loose parts, or wiring issues can slow your fan. Regular cleaning and maintenance help, but electrical problems need professional attention for safety.
Frequently Asked Questions
Why does my ceiling fan only run on one speed?
This often points to a faulty capacitor or a problem with the pull chain switch or wall control wiring. An electrician can diagnose the specific cause.
Does running a ceiling fan on a lower speed save electricity?
Yes, ceiling fans consume less power when operating at lower speeds. The motor works less hard, reducing energy usage compared to higher settings.
What is a typical RPM for a ceiling fan?
RPM varies by size and model. Standard fans might run 50-100 RPM on low, while high-speed models can reach 350 RPM or more on high.
Can I use any wall dimmer switch with my ceiling fan?
No, using a standard light dimmer switch can damage the fan motor. You must use a fan-specific speed control switch compatible with your model.
My fan is slow even after cleaning and checking the capacitor. What else?
Check for blade balance issues (wobbling), ensure bearings aren’t worn (listen for noise), and verify electrical connections are secure. Professional help might be needed.
How often should I clean my ceiling fan blades?
Clean blades every 2-3 months, or more often in dusty environments. Regular cleaning prevents buildup that slows the fan and affects air quality.
Is it safe to leave a ceiling fan running all the time?
Generally yes, but turn it off when leaving the room to save energy. Ensure it’s well-maintained to prevent overheating or mechanical issues from developing.
Why is my fan slow to start?
A slow start often indicates a weak starting capacitor, the part giving the initial boost. It might also be due to excessive friction from dirty or worn bearings.

