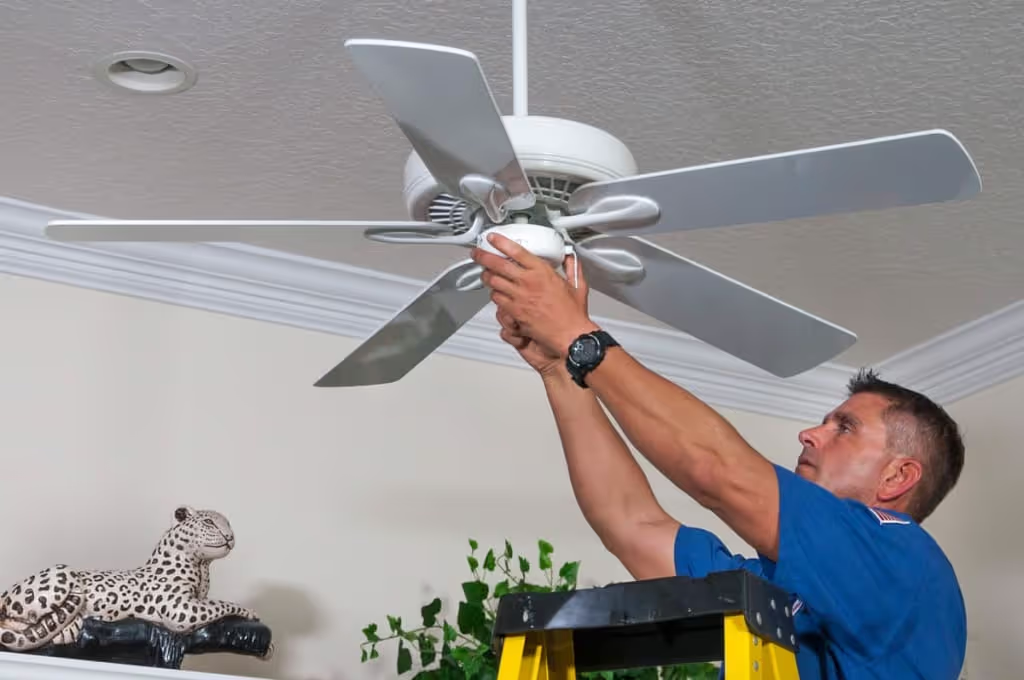
Is your ceiling fan refusing to work?
Don’t sweat it!
Many common fan problems have simple fixes you can often do yourself, saving you time and discomfort.
To troubleshoot a ceiling fan, start by checking the power supply: ensure the wall switch is on and the circuit breaker hasn’t tripped.
Then, inspect the fan itself for loose wires, blade issues, or motor problems.
Simple checks often solve the issue quickly.
Dealing with a broken ceiling fan can be annoying, especially during hot weather.
But before calling a professional, let’s explore some common issues and how you can try to fix them.
Keep reading to learn step-by-step troubleshooting tips.
Check the Power Supply
The power source is the first place to look.
Often, a simple switch flip or breaker reset fixes it.
First, ensure the wall switch controlling the fan is ON.
Then, locate your home’s circuit breaker box.
Find the breaker for the fan’s room and reset it if it has tripped off.
When your ceiling fan suddenly stops working, the lack of power is the most common and easiest issue to check.
Don’t assume the worst right away. Start with the basics.
Basic Power and Switch Checks
- Find the Wall Switch: This seems simple, but it’s the most common culprit. Make sure the wall switch that controls the fan is in the ‘ON’ position. If multiple switches are in the room, test them all.
- Check the Pull Chain: If your fan has a pull chain for power, make sure it is also in the ‘ON’ position. Sometimes it gets pulled by mistake.
- Check the Reverse Switch: Most fans have a small switch on the motor housing that changes the blade direction. If this switch is accidentally left in the middle or in a neutral position, the fan will not run. Push it firmly all the way to one side or the other.
- Locate and Reset the Circuit Breaker: Go to your home’s electrical panel (breaker box). This is usually in a utility room, basement, or garage. Look for the circuit breakers, which look like switches. Find the label for the room where the fan is (e.g., “Living Room”). A tripped breaker will be shifted towards the ‘OFF’ position or be stuck in the middle. To reset it, push the breaker handle firmly all the way to ‘OFF’, and then flip it back to the ‘ON’ position. Go back and check if the fan works.
Checking the Switch Wiring (Use Caution)
If the breaker wasn’t tripped or resetting it didn’t help, the wall switch itself might be faulty.
Warning: Working with electrical wiring is dangerous.
If you are not comfortable or experienced, call a qualified electrician.
If you choose to proceed, follow these steps:
- Turn Off Power: Go to the breaker box and turn off the circuit breaker for the fan.
- Confirm Power is Off: Use a non-contact voltage tester at the switch to make sure the power is completely off.
- Inspect the Switch: Carefully remove the switch’s cover plate. Unscrew the switch from the wall box and gently pull it out.
- Look for Loose Wires: Check the wires connected to the switch’s screw terminals. Are any of them loose? Gently tug on them. Look for any wires that have come loose from the wire connectors (wire nuts).
- Look for Damage: Check for signs of damage like melted plastic, scorch marks, or burnt smells. If the switch looks damaged, it must be replaced.
- Tighten or Replace: If you find loose wires, tighten the screws or reconnect them securely. If the switch seems faulty, replacing it is often the best solution.
Inspect the Fan Blades and Motor
Is your fan getting power but still not spinning?
Problems with the blades or motor could be the culprit.
Let’s investigate these parts.
Check the fan blades for damage, dirt buildup, or looseness.
Then, inspect the motor housing for obstructions or loose wires.
Cleaning and tightening screws often helps restore function.
If the power supply seems fine, the next step is to look closely at the fan itself.
Physical issues with the blades or the motor are common reasons why a fan might stop working.
Start with the blades.
Check Blades and Holders
- Clean the Blades: Over time, dust and grime can build up, making blades heavy and unbalancing the fan. Clean both sides of each blade thoroughly.
- Check for Damage: While cleaning, check if any blades look bent, warped, or cracked.
- Tighten Screws: Check where the blades attach to the motor housing (the blade irons or holders). Make sure the screws holding the blades to the holders are tight. Then, check the screws holding the holders to the motor. Loose screws are a very common cause of wobbling and can sometimes affect operation.
- Spin by Hand: Gently push the blades by hand. Do they spin freely? If not, something might be jammed or the motor bearings could be seized.
Checking the Motor and Wiring
If the blades look okay and spin freely, the issue might be with the motor or its wiring.
Safety First: Always turn off the power to the fan at the circuit breaker before touching any internal parts.
Once the power is off, you may need to remove the light kit and the motor housing cover to look inside.
This usually involves removing a few screws.
- Look for Loose Wires: Inside, look for any obvious problems. Are there any wires that have come loose from their wire nuts? Gently tug on the wires to ensure they are secure.
- Look for Damage: Look for any signs of overheating, like melted plastic insulation on wires or scorch marks on the motor.
- Check for Obstructions: Check if anything is physically blocking the motor shaft from turning. Sometimes a wire can shift out of place and obstruct movement.
- Fix Wires: If you see loose wires, reconnect them securely. If you see frayed or burnt wires, they need repair. You can temporarily wrap frayed insulation with electrical tape, but replacing the damaged section of wire is the correct long-term fix. If the motor itself looks burnt, it has likely failed.
Testing the Motor Power
If you don’t see any obvious visual issues, you can use a non-contact voltage tester or a multimeter to check if power is reaching the motor.
With the power turned back on briefly and carefully, test the wires leading directly into the motor.
If the motor is receiving power but not turning, it strongly suggests the motor itself has failed.
If the motor is not receiving power, the problem is in the wiring, possibly at the switch, the ceiling connection, or the fan’s internal wiring harness.
Fan Operates Slowly or Only at One Speed
Is your fan stuck in low gear or only working on one setting?
This common issue often points to specific internal components needing attention.
A fan running slow or at a single speed usually indicates a problem with the capacitor or the pull-chain switch.
Checking these parts can often restore full speed control.
When your ceiling fan refuses to change speeds or seems permanently stuck on low, it’s frustrating.
This problem typically doesn’t mean the entire fan is broken.
More often, it’s related to the components that regulate the motor’s speed.
The two most likely culprits are the fan’s speed switch (pull chain) and the capacitor.
Understanding the Capacitor’s Role
The capacitor is a small electrical component, usually a black box, found in the switch housing (where the pull chains hang).
It plays a crucial role in starting the motor and regulating the power for different speed settings.
Capacitors store and release electrical energy to control the low, medium, and high speeds.
Over time, capacitors can degrade or fail.
A failing capacitor might cause the fan to run slowly, hum, or only work on one speed (often high).
A completely burnt-out capacitor might prevent the fan from starting at all.
Checking and Replacing the Capacitor
Safety First: Turn off power at the breaker.
To check the capacitor, you’ll need to open the switch housing.
- Locate the Capacitor: Find the component, which often has multiple wires coming out of it.
- Look for Damage: Look for visual signs of damage: is the capacitor bulging, leaking, or showing burn marks? If so, it needs replacing.
- Get a Replacement: Note the specifications written on the old capacitor (microfarad rating – µF, voltage rating – VAC, and number of wires). You need a compatible replacement.
- Replace It: Take a photo of the wire connections before you start. Carefully disconnect the wires of the old capacitor and connect the new one, matching the wire colors or positions from your photo. Use wire nuts to secure the connections.
Inspecting the Speed Switch (Pull Chain)
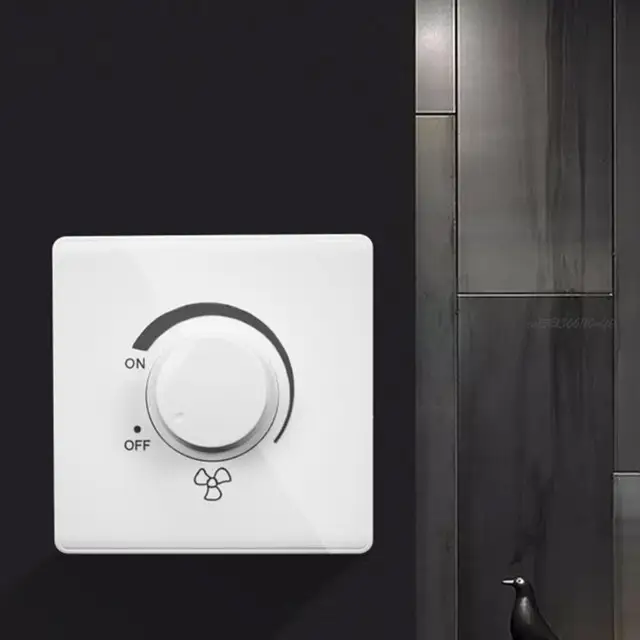
If the capacitor is fine or replacing it didn’t help, the issue might be the speed switch itself.
These switches contain contacts that can wear out.
With the power still off, inspect the switch mechanism.
Does the chain pull smoothly? Do you hear distinct clicks for each speed?
If the switch feels broken or doesn’t click properly, it likely needs replacement.
This involves disconnecting its wires and connecting a new switch, matching the wire order.
Check for Motor Issues
If the fan runs hot, it could be an internal motor problem.
Let the fan run for 10 minutes, then turn it off.
Carefully feel the motor housing.
If it feels very hot, the internal bearings might be damaged, which usually means the motor needs tobe replaced.
Weird Noises (Grinding, Clicking, Humming)
Is your fan making strange sounds like grinding, clicking, or humming?
These noises can be annoying and might signal an underlying problem.
Noisy fans often result from loose screws, parts rubbing together, or motor issues.
Tightening screws, checking for obstructions, and ensuring proper lubrication can often silence the sounds.
Ceiling fan noises can range from a faint hum to loud, distracting grinding or clicking sounds.
Any sudden or loud noise should be investigated.
Finding the Source: Loose Components
The first thing to check for is anything loose.
Turn off the power at the breaker.
- Tighten Screws: Systematically check and tighten all screws.
- Screws holding the fan blades to the blade irons (brackets).
- Screws holding the blade irons to the motor housing.
- Screws securing the light kit and any glass shades.
- Screws holding the motor housing cover and the canopy cover (against the ceiling).
- Check Light Bulbs: Even a slightly loose light bulb can rattle in its socket.
- Check Wires: Look inside the canopy and switch housing. Make sure wires are tucked away and not rubbing against moving parts.
New Fan Break-in
If you just installed the fan, give it 24 hours to settle.
Minor noises are common during this break-in period and may go away on their own.
Addressing Motor Hum or Grind
A persistent humming noise could be an electrical issue.
- Check Dimmer: Are you using a dimmer switch? Standard dimmers are not rated for ceiling fans and will cause the motor to hum. Fans need specific, fan-rated speed controller switches.
- Capacitor: A loud hum, especially if the fan is slow, can also point to a failing capacitor.
- Grinding: A grinding or scraping sound often suggests problems with the motor bearings. Bearings can wear out over time. Most modern fans have sealed bearings that don’t require lubrication. Some very old fans have oil reservoirs that may need refilling, but this is rare. If you hear grinding, the motor likely needs replacement.
Wobbly Fan
Does your ceiling fan shake or wobble when it runs?
This is not only distracting but can also be unsafe over time.
A wobbly fan is usually caused by unbalanced blades, loose screws, or improper mounting.
Balancing the blades and tightening all connections typically solves the shaking.
A ceiling fan that wobbles can be alarming.
Wobbling puts extra stress on the fan’s mounting hardware and motor, potentially leading to damage.
Luckily, the causes are often straightforward to fix.
Checking for Simple Causes First
Turn off the power at the breaker.
- Clean the Blades: First, clean the blades thoroughly. Uneven dust buildup can throw off the balance.
- Inspect Blades: While cleaning, check for any warped, cracked, or damaged blades.
- Tighten All Screws: Systematically check and tighten every screw you can find. This includes screws holding the blades to the blade irons, the blade irons to the motor, the downrod, the light kit, and the mounting bracket to the ceiling.
Checking the Mounting
If tightening screws doesn’t help, examine how the fan is mounted.
- Ceiling Box: The electrical box in the ceiling must be securely attached to a ceiling joist or a fan-rated brace. A standard electrical box is not designed for a fan and can flex, causing a wobble.
- Hanger Ball: Most fans use a hanger ball system. Ensure the ball is properly seated in the mounting bracket’s groove.
Balancing the Blades
If all connections are tight and the mounting is secure, the wobble is likely due to an imbalance in the blades. You can use a ceiling fan balancing kit.
- Attach the Clip: Attach the plastic clip from the kit to the trailing edge of one fan blade, midway between the holder and the tip.
- Test: Turn the fan on and see if the wobble improves or worsens.
- Repeat: Turn the fan off. Move the clip to the next blade and test again. Repeat for all blades to find the one where the clip most reduced the wobble.
- Find the Spot: On that blade, move the clip in and out along the edge to find the spot where the wobble is minimized the most.
- Add the Weight: Turn the fan off. Remove the clip and stick one of the adhesive-backed balancing weights onto the top center of the blade, in line with where the clip was. You might need to add a second weight to eliminate the wobble.
Flickering Lights or Light Not Working
Does the light on your ceiling fan flicker annoyingly, or has it stopped working altogether?
Light issues are common and often separate from fan motor problems.
Flickering or dead lights usually stem from loose bulbs, incorrect wattage bulbs, or faulty wiring/sockets.
Checking bulbs and connections is the first step to fixing the light.
When your ceiling fan lights start flickering or stop working, it can be a nuisance.
Troubleshooting these light issues usually starts with the simplest solutions.
Checking the Bulbs
Turn off the power via the wall switch or pull chain for the light.
- Check Tightness: Are the bulbs screwed in tightly? Vibrations from the fan can loosen them over time. Gently tighten any loose bulbs.
- Replace Bulbs: The bulb itself might be burned out or failing. Try replacing the bulb with a new one.
- Verify Bulb Wattage: Using bulbs with a wattage higher than the fixture’s maximum rating can cause problems. Most fixtures have a label inside the socket (e.g., “Max 60W”). A high-wattage bulb can overheat the socket or trigger a limiter device that shuts the light off. Replace any incorrect bulbs with ones of the correct wattage or lower. LED bulbs are a great option as they use less wattage and run cooler.
Inspecting Sockets and Wiring
If new, correct-wattage bulbs don’t fix it, the issue might be with the socket or wiring. Turn off power at the circuit breaker before proceeding.
- Inspect the Socket: Look inside the light socket. Do you see any black marks or charring? This indicates overheating, and the socket may need replacement. Sometimes, a small metal tab inside the socket gets flattened and doesn’t touch the bulb. With the power off, you can gently pry this tab up slightly.
- Inspect Wiring: You may need to remove the light kit housing to inspect the internal wiring. Look for the wires connecting the light kit (often a blue wire is for the light). Ensure all wire nut connections are secure. Gently tug on the wires to make sure they haven’t come loose.
- Check the Pull Chain: If the light is controlled by a separate pull chain, the switch mechanism within that chain could be faulty, similar to the fan speed switch.
Remote Control Not Working
Losing convenient control can be a real pain, especially for fans without pull chains.
When a ceiling fan remote fails, first check the batteries.
If batteries are good, check the receiver unit in the fan canopy and ensure the dip switches or frequency settings match the remote.
When your remote stops working, it can be frustrating.
Troubleshooting usually involves the remote, the receiver in the fan, and the settings that connect them.
Starting with the Basics
- Check Batteries: This is the most common fix. Open the remote and replace the batteries with fresh ones. Make sure they are inserted with the correct polarity (+ and -).
- Check Pull Chains: If your fan has both pull chains and a remote, the fan’s speed pull chain must be set to HIGH, and the light pull chain must be set to ON. The remote cannot control a fan that is turned off at the chain.
Checking the Receiver and Dip Switches
If new batteries don’t work, the remote may have lost its connection to the receiver. Turn off the power to the fan at the circuit breaker.
- Find the Receiver: The receiver is a small box tucked into the fan’s mounting bracket or canopy against the ceiling. You’ll need to lower the canopy cover to access it.
- Check Dip Switches: Look for a set of small “dip switches” on both the receiver and inside the remote (often in the battery compartment).
- Match Settings: The pattern of these switches (up or down) must be exactly the same on both the remote and the receiver. If they don’t match, set them to the same pattern.
- Reset Frequency: If they already match, your neighbor’s remote might be on the same frequency. Try changing the dip switches on both the remote and receiver to a new, identical pattern.
- Re-pair: Some newer fans use a “pairing” button instead of switches. Consult your fan’s manual for the re-pairing procedure.
Replacing the Remote or Receiver
If these steps fail, either the remote control itself or the receiver unit in the fan might be faulty.
You can often buy universal remotes or replacements specific to your fan model.
Conclusion
Troubleshooting a ceiling fan often involves simple checks like power, blades, and connections. Addressing common issues like wobbling or noise can restore comfort and prevent bigger problems.
Frequently Asked Questions (FAQ)
How do you test a ceiling fan capacitor?
Use a multimeter (after safely discharging it) to check if the microfarad (µF) reading matches its rating. Visual signs like bulging or leaks also indicate failure.
Can a ceiling fan motor be repaired?
Generally, no. Internal motor parts are rarely user-serviceable. If the motor fails, replacing the entire motor assembly or the whole fan is usually the necessary fix.
Why is my ceiling fan humming loudly?
Loud humming might be due to loose screws, an incompatible dimmer switch (it needs a fan-rated controller), or a failing capacitor. Ensure all parts are tight first.
How do you balance a ceiling fan without a kit?
Clean blades and tighten all screws. Measure the distance from each blade tip to the ceiling; if uneven, gently bend the blade iron (the metal bracket) up or down to make them even.
What causes a ceiling fan remote receiver to fail?
Receivers can fail from age, power surges, overheating in the canopy, or internal component failure. Replacing the receiver is often required.
Can a wall switch cause a fan to malfunction?
Yes, a faulty wall switch or an incorrect type of speed controller (like a dimmer) can stop the fan from working, cause humming, or prevent it from changing speeds.
How often should ceiling fans be cleaned?
Clean the blades every 2-3 months to prevent dust buildup. Dust causes imbalance, which leads to wobbling and motor strain.
Is it safe to leave a ceiling fan on 24/7?
Modern fans are generally safe for continuous operation. However, turn it off if you hear unusual noises or if you leave home for long periods to save energy.
